Table of Contents
ToggleThe ever increasing demand for energy, high cost of production and scarcity of natural resources have instigated scientists to think of another alternate source of energy.
With the advancement of rooftop solar technology, it has become a saviour for thousands of nations across the globe as an excellent alternative and clean way of producing electric power.
In the last few years, there has been an increasing trend of more and more people investing in rooftop solar power systems.
And guess what?
Installing solar power paves a beautiful way to generate clean and eco-friendly energy without causing any significant environmental footprint.
How is rooftop solar power beneficial?
There are several reasons why installing a solar panel can be beneficial to your home.
Firstly, it leaves a minimal environmental footprint as it gives out energy which is clean, sustainable and renewable. Secondly, investing in a renewable energy source can improve economic stability.
Installing a solar power system in your home helps you to get back the return of investment in 4 to 5 years and additionally you can pump back the excess electricity to the primary power grid and start earning.
Finally, It saves a lot of money that is lost on monthly electric bills. It will help you to reduce your dependence on the external power grid.
Factors to consider before installation


1. Condition of your roof
It is vital to check the health condition of your roof beforehand if you plan to install the panels.
If you find that the condition of your roof is not good or it might need some repairs in a few years, there is no point in installing the panels as most of the panels are designed to last for about 20 years.
And even if you do, it will cost you extra to dismantle the panels to fix your roof and reassemble it again.
So the first thing to do before installation is to thoroughly repair your roof and make it as good as new. Doing this also allows you to check whether your roof has enough capacity to hold the panels.
2. Shape of your roof
This is one factor which plays a significant role in determining whether your roof has enough space to install a solar panel or not.
If there is not enough room to fix the solar panels, there’s a high chance that you might not get back the expected returns of your investment.
3. Slope of the roof
Roof slope is a determining factor for the efficiency of solar panels. Solar panels require a specific placement for receiving maximum sunlight and for easy drainage of rainwater.
The best possible inclination is at 10 to 30 degrees for peak performance and easy drainage.
4. Weight handling capacity of the roof
Your roof is specifically designed to handle a certain amount of weight, beyond which it will collapse. When you are installing panels over your roof, you are increasing an additional burden of the weight on the roof.
If proper precaution is not taken , the chances are high that a weak roof could collapse at any point of time, causing severe casualties.
It is vital to hire a professional to evaluate the strength of your roof before installing the panels.
5. Providing proper runoff facility for water


When rainwater falls on top of the solar panels, the entire range of equipment and wires can prevent proper flowing of water.
In some instances, the water might seep through or even flow in a different direction. It all depends on several factors such as the shape of your roofing, the position of panels and so on.
Make sure to consult with an expert installer to ensure that no such problems occur.
7. Preventive method to deal with other natural forces
Rooftop solar panels often get exposed to various surprises from mother nature such as snowfall, torrential showers, storms, hurricanes and more. If the intensity of these natural elements is beyond a certain manageable level, the equipment might get damaged.
Make sure to get in touch with an expert installer to ensure that you take the right precautions before installing.
8. Choosing the right type of solar panel
The two popular types of solar panels available are polycrystalline and monocrystalline panels.
A polycrystalline panel is made of multiple crystals of silicon and a monocrystalline panel out of a single crystal of silicon.
From a scientific point of view, monocrystalline panels are slightly more efficient. However, when it comes to the efficiency of the solar panel, a range of factors has to be included.
This includes the design, circuitry, placement, fabrication and many others.
It is better to personally inspect the panels before reaching a definite conclusion.
9. Rate of power consumption
For every building, the amount of power consumption varies depending on several factors such as the extent of use, appliances, gadgets and other machinery.
Evaluating the average monthly units of electricity used will help you to determine the number of panels you will have to use for your household.
An individual cell in a panel will give about 0.5V, and there are about 36 to 72 photovoltaic cells in a solar panel.
10. Warranty of the product
Before we discuss the warranty it is essential to keep in mind that the warranty depends on the manufacturer and the county.
Warranty is a critical aspect when it comes to protecting your solar panels and other related pieces of equipment.
If any unexpected damage occurs to the equipment, having a valid warranty will help you save on the cost of repair and replacement. This will also help to make your manufacturer accountable.
Let us examine some of the different types of warranty.
Installation Warranty
Installation warranty is for 2-10 years approximately. It can be used in a situation where the panels are installed incorrectly. Often this warranty covers the cost of replacement parts along with the labour charges.
Solar panel warranty
Warranty is provided for solar panels for replacement or repair.
Product warranty:10 years
90% Peak energy output: 15 years
80% Peak energy output: 20 years
Inverter warranty
This won’t cover the damage due to normal wear and tear, improper installation and improper maintenance.
String inverter: 5-10 years
Microinverter: 20-25 years
Step by step procedure to install solar panels
The following is an easy guide for understanding more about solar panel installation:
Step 1: Find an ideal location
The first and foremost thing to do before installing the solar panels is to evaluate the place that you have planned to install the panels.


Do keep in mind that simply because some portion of your roof is exposed to the sun doesn’t mean that it could be the ideal location.
The direction and pitch of your roof affect the performance of your panels.
Make sure that you choose a location that is ideal for fixing the panels in the long term and having maximum exposure to the sun all throughout the year.
Step 2: Mount installation
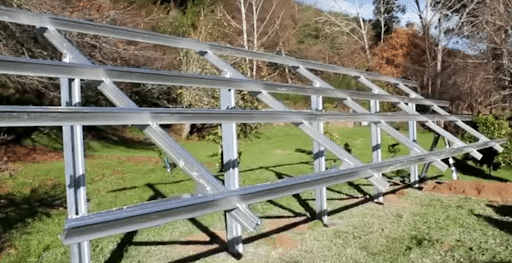
Once you have identified and chosen an ideal location, the next step is to fix the mounts that will support the solar panels.


Depending on the requirements, it will be either flush mount or roof ground mount. The base portion of the mount should be strong enough to withstand the weight of the panels and to last long enough to withstand all the weather conditions.
The alignment should be proper to ensure maximum exposure to the sun.
South direction: Best for countries in Northern hemisphere
North direction: Best for countries in Southern hemisphere
Step 3: Install the panels
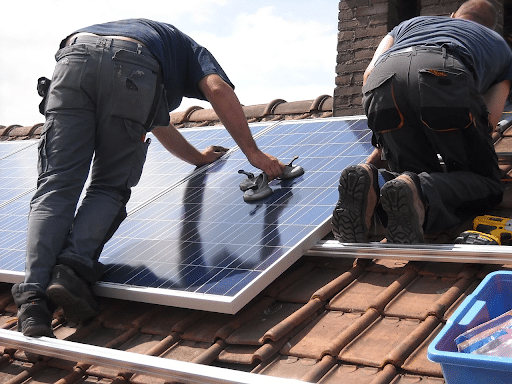
The next step is to fix the solar panels on the mounting structure tightly with bolts and screws. Care should be taken to ensure that it won’t get loose when affected by wind or rain. The whole structure should be sturdy to make it long-lasting.
Step 4: Wiring
The wiring is a crucial part, and if you are an inexperienced person, it is better to hire professional help to avoid accidents.


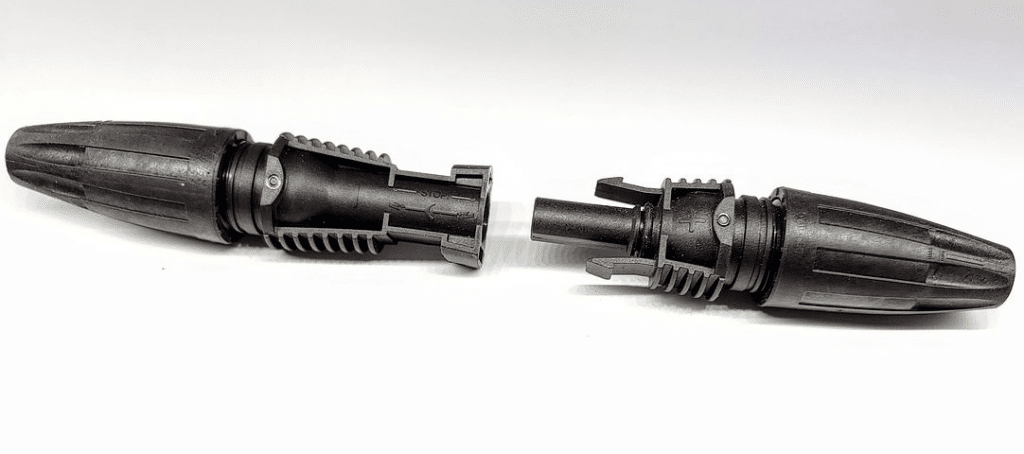
Solar modules can be wired together by using a junction connector or fuse combiner box. Universal connectors such as MC4 are best as they can be connected to all types of panels.
The cables should be well insulated to avoid any power leakage of accidents.
The two connections that are commonly used are:
1.Parallel connection: Here, the (+) Positive is connected to a positive (+) and Negative (-) to a Negative (-).
2.Series connection: Here, the (+) Positive of one module is connected to Negative (-) of other PV modules. This type of contact helps to increase the voltage match with the storage battery.
Step 5: Connect the system to the inverter and battery.
Once the internal wiring is complete, connect it with an inverter and battery.
This connection will facilitate the electricity to flow from the disconnect to a charge controller and finally to a battery bank where the power is stored.


Source:Pinterest
The positive terminal of the inverter should be connected to the positive terminal of the battery and vice versa.
There is also another option for the electric charge to flow from the disconnect to an inverter. Whether the charge will first flow to the inverter or the charge controller depends on the design of the solar power module.
Different manufacturers use different designs.
Step 6: Connect inverter to the power grid
Once the internal connections are complete, it is time to connect the system to the external power grid.


A typical plug is used to connect to the main power switchboard, and an output wire will be connected with the electric board through which electricity is supplied to the home.
Step 7: Make sure to have a proper grounding.
It is essential to have a proper earthing connection after the panels are installed.
The advantages of proper grounding are:
- Protects the equipment from an unexpected power surge.
- Protects you and your family from danger due to electric shock.
- Protects the house from the risk of fire.
Step: 8: Test Run
Upon completion of all the steps as mentioned above, you can switch on the inverter switch placed on the central control of your home. Most investors will have a display to show the amount of power generated and used. The primary purpose of the test run is to ensure that everything is working correctly and as expected.
Common mistakes when installing solar panels
1. Use GIA stands
Make sure that the structure for mounting solar panels is made of GIA. Unlike iron stands, GIA stands are rustproof and lasts for a very long time.
2. The solar panels should be fixed properly
The mounting structures on which the solar panels are laid should be grounded with civil work. It should not move or sway. Top-grade anchors should be used to fasten it on the ground.
3. Use MC4 connectors


Unlike tapes, MC4 connectors won’t get detached unless a tool is applied. This will help to ensure that the connection remains active for a long time.
4. Use good earthing
Proper earthing will help to ensure that the system is protected against overload or any voltage mishaps.
5. 30 Degree Installation
It is better to have a 30 degree installation angle for maximum efficiency.
Final Words
If you do not have a rooftop solar panel yet, it is high time to invest in one. It not only saves your electricity bill but will prove highly beneficial for the environment in the long run.
You could use the steps mentioned above to install a solar panel for yourself. It is suggested that you hire a certified technician to take care of the installation.


